React Native Project Structure: The Complete Guide to Scalable Mobile Apps
Learn how to structure React Native projects for scalability, maintainability, and team collaboration. Real-world examples, best practices, and actionable patterns used by top companies.
So you’ve decided to build a mobile app with React Native. Smart move! But now you’re staring at that default project folder, wondering how to organize everything before your app becomes a tangled mess of code. You’re not alone — every React Native developer faces this moment.
The truth is, React Native doesn’t enforce any specific structure, which is both its greatest freedom and its biggest trap . Without thoughtful organization, your project can quickly become what developers call “spaghetti code” — impossible to navigate, maintain, or scale. But with the right structure, you can build apps that grow gracefully from prototype to production.
Why Structure Matters More Than You Think
Let’s be real: when you’re excited about building features, thinking about folders feels boring. But here’s the deal — the companies winning with React Native (Facebook, Airbnb, Shopify, Bloomberg) all prioritize structure from day one .
A good structure:
Makes onboarding new developers take days instead of weeks
Prevents “who broke what?” scenarios when multiple people work on the app
Saves countless hours when you need to update dependencies or refactor code
Makes testing actually feasible instead of an afterthought
Think of it like building a house — you wouldn’t start hammering nails without a blueprint. Your project structure is that blueprint for your app.
The Three Main Approaches (And When to Use Each)
Based on industry standards and what actually works in production, here are the three primary ways to structure your React Native project:
1. Type-Based Structure (Perfect for Most Apps)
This is the most common approach you’ll see in tutorials and medium-sized projects. You organize files by what they are rather than what they do.
Here’s what it looks like:
javascript
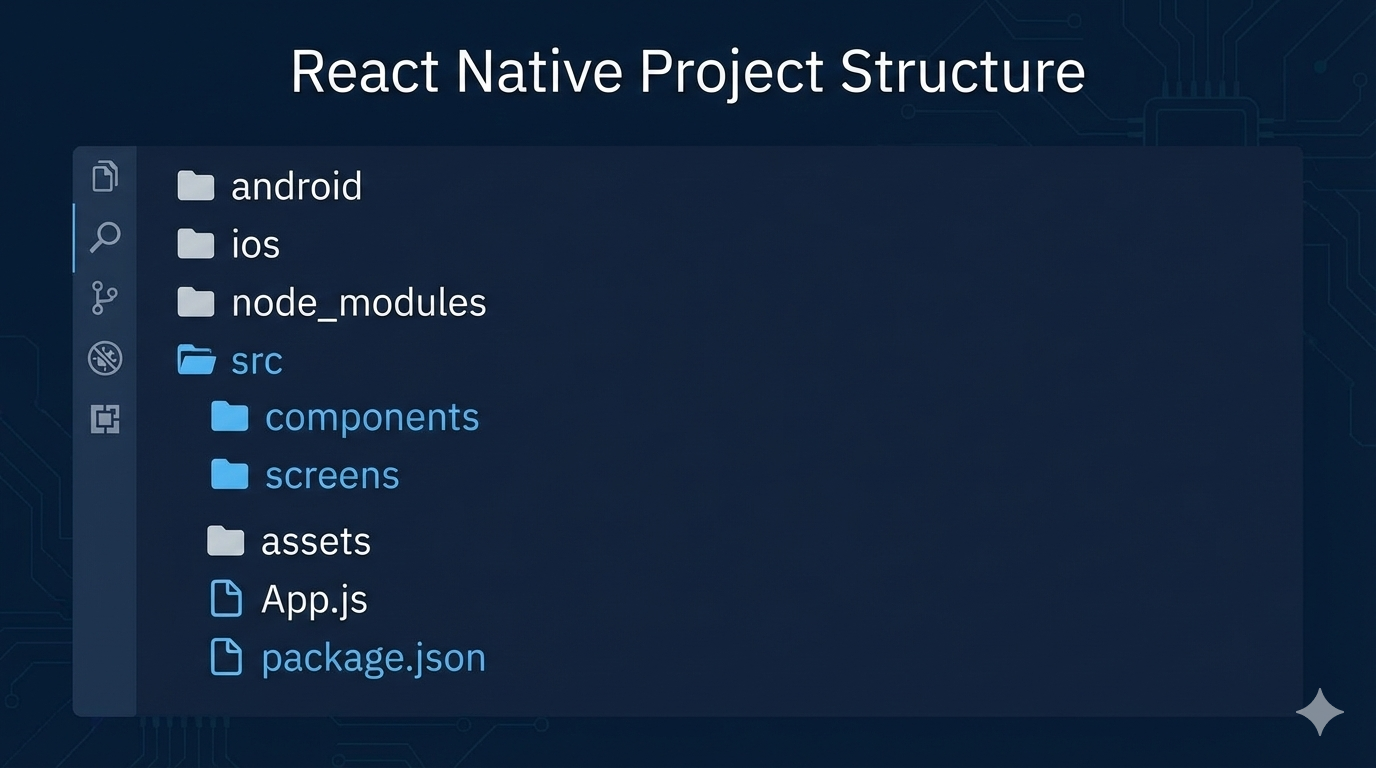
src/
├── components/          # Reusable UI pieces
├── screens/            # Full-screen components
├── navigation/         # All routing logic
├── services/           # API calls and external services
├── hooks/              # Custom React hooks
├── utils/              # Helper functions
├── constants/          # App-wide constants
├── assets/             # Images, fonts, etc.
└── redux/              # State management (if using Redux)
When to use this: Projects with 5-15 screens, small to medium teams, or when you’re not sure how large the app will grow. It’s intuitive and follows the “separation of concerns” principle that makes React so powerful .
2. Feature-Based Structure (For Complex, Scalable Apps)
When your app has distinct features that could almost be their own mini-apps (think: authentication, shopping cart, user profile), this approach shines.
Example:
javascript
src/
├── features/
│   ├── auth/
│   │   ├── components/
│   │   ├── screens/
│   │   ├── services/
│   │   └── hooks/
│   ├── cart/
│   └── profile/
├── shared/
│   ├── components/
│   ├── hooks/
│   └── utils/
└── navigation/
When to use this: Larger apps with 20+ screens, multiple development teams, or enterprise applications. Companies like Facebook and Airbnb use variations of this because it allows teams to work independently without stepping on each other’s code .
3. Atomic Design Structure (For Design-Conscious Teams)
Inspired by chemistry, this breaks UI components into atoms (smallest pieces), molecules (combinations of atoms), organisms (complex UI sections), templates, and pages.
javascript
src/
├── components/
│   ├── atoms/          # Button, Input, Text
│   ├── molecules/      # SearchBar, CardHeader
│   ├── organisms/      # ProductCard, UserProfile
│   ├── templates/      # Page layouts
│   └── pages/          # Complete screens
└── ...
When to use this: Apps with strict design systems, large component libraries, or when design consistency across platforms is critical .
Deep Dive: A Production-Ready Structure That Actually Works
Let me share a structure I’ve used in multiple production apps that balances simplicity with scalability. This isn’t just theory — it’s battle-tested.
The Core Directory Breakdown
/src/components — Your reusable UI building blocks
Each component gets its own folder with:
index.js(export default component)ComponentName.jsx(main component file)styles.js(component-specific styles)helpers.js(component logic)ComponentName.test.js(tests)
Why this matters: When you need to update a button style, you know exactly where to go. No searching through multiple screen files.
/src/screens — Your full-page components
Screen structure mirrors components but adds:
useScreenLogic.js(business logic hook)useAnimations.js(animation logic, keeping it separate from business logic)
Pro tip from experience: Keep your screen files lean. Move logic to hooks, animations to separate files, and reusable pieces to components. Your future self will thank you when debugging at 2 AM before a launch .
/src/navigation — The app’s roadmap
AppNavigator.js(main navigation container)RootStack.js(primary stack navigator)AuthStack.js(authentication flow)LinkingConfig.js(deep linking configuration)NavigationService.js(programmatic navigation)
Game-changer alert: Create a NavigationService that lets you navigate from anywhere (even outside React components):
javascript
// navigation/NavigationService.js
import { createNavigationContainerRef } from '@react-navigation/native';

export const navigationRef = createNavigationContainerRef();

export function navigate(name, params) {
  if (navigationRef.isReady()) {
    navigationRef.navigate(name, params);
  }
}
// Use anywhere: NavigationService.navigate('Home')
/src/services — Your app’s connection to the world
api/(API configuration, interceptors)auth/(authentication services)analytics/(tracking services)pushNotifications/(notification handling)
Critical practice: Use interceptors for consistent error handling and request/response transformation. This centralizes your API logic so when the backend changes, you update one place instead of hunting through dozens of files .
/src/utils — The Swiss Army knife
formatters.js(date, currency, text formatting)validators.js(input validation)device.js(device-specific helpers)storage.js(AsyncStorage/secure storage wrappers)constants.js(app-wide constants)logger.js(structured logging)
/src/hooks — Custom React hooks
useDebounce.js(delay function execution)useNetworkStatus.js(track online/offline)useKeyboard.js(keyboard visibility)useBackHandler.js(Android back button)
Special Considerations
State Management: If using Redux:
javascript
/src/redux/
├── store.js
├── slices/           # Redux Toolkit slices
│   ├── authSlice.js
│   ├── cartSlice.js
│   └── userSlice.js
└── selectors/        # Memoized selectors
Assets Organization:
javascript
/assets/
├── images/
│   ├── icons/
│   ├── illustrations/
│   └── backgrounds/
├── fonts/
├── videos/ (if needed)
└── locales/ (translation files)
Testing Strategy: Place test files next to what they test. This keeps related files together and makes it obvious what’s tested (and what’s not).
Real-World Example: How Big Companies Do It
Facebook/Meta: Uses a highly modular, feature-based structure. Each team owns their feature directory, with shared components in a central fbui (Facebook UI) library. They’ve open-sourced some of this as the React Native Design System.
Shopify: All mobile apps at Shopify are built with React Native using a monorepo structure with clear boundaries between modules. They emphasize document-driven development where the folder structure documents the app architecture .
Airbnb (while they used React Native): Pioneered the “colocation” principle — keeping related files (components, tests, styles) together rather than separating by type. This made features self-contained and easier to reason about .
Common Pitfalls and How to Avoid Them
The “Everything in Components” Trap
Problem: Throwing utilities, constants, and helpers into random component files.
Solution: If a function/constant is used in more than one place, it belongs in/utilsor/constants.Navigation Spaghetti
Problem: Navigation logic scattered across screens.
Solution: Centralize all navigation in/src/navigation. Screens should not contain navigation logic beyond callingnavigation.navigate().Asset Chaos
Problem: Images and fonts scattered everywhere.
Solution: All static assets go in/assetswith clear subfolders. Use a consistent naming convention.The “We’ll Structure Later” Mistake
Problem: Thinking you’ll reorganize when the app gets bigger (you won’t).
Solution: Start with at least a basic type-based structure from day one. It’s easier to evolve a structure than to impose one later.
Evolution: How Structure Changes as Your App Grows
Phase 1: Prototype (1 developer, < 10 screens)
Type-based structure
Keep it simple
Focus on getting features working
Phase 2: Growing App (2-5 developers, 10-30 screens)
Introduce feature-based organization for complex features
Add proper testing structure
Document the architecture
Phase 3: Production App (5+ developers, 30+ screens)
Feature-based or monorepo structure
Clear boundaries between modules
Automated code quality checks
Well-defined contribution guidelines
Phase 4: Enterprise/Platform (Multiple teams, 50+ screens)
Monorepo with package boundaries
Design system component library
Microservices-like feature isolation
Strict API contracts between modules
Your Action Plan
Start simple: Use the type-based structure unless you know you’re building the next Facebook.
Be consistent: Pick naming conventions and stick to them (camelCase vs. PascalCase, etc.).
Document decisions: Add a
STRUCTURE.mdfile explaining why you organized things a certain way.Review periodically: Every 3-6 months, ask: “Is our structure still working for us?”
Refactor early: If something feels awkward to find or use, fix it now before it spreads.
Final Thoughts: Structure as a Living System
Here’s the secret nobody tells you: There’s no perfect structure. What matters is having a structure that your team understands and follows consistently. The best structure is the one that makes your codebase predictable — where developers can guess where to find things without being told.
Remember that your structure will evolve as your app grows. What works for a 5-screen app won’t work for a 50-screen app, and that’s okay. The key is to recognize when you’ve outgrown your current organization and have the courage to refactor.
A well-structured React Native app isn’t just about clean code — it’s about developer happiness, team velocity, and product quality. When you can find what you need in seconds instead of minutes, fix bugs without fear of breaking unrelated features, and onboard new team members in days instead of weeks, you’re not just writing code — you’re building a sustainable foundation for success.
Want to master professional app development? Structure is just one piece of the puzzle. To learn professional software development courses such as Python Programming, Full Stack Development, and MERN Stack, visit and enroll today at codercrafter.in. Build the skills that top companies actually look for.
FAQs
Q: Should I use TypeScript or JavaScript?
A: For serious projects, TypeScript is worth the learning curve. The type safety catches errors early and makes large codebases more maintainable. Many companies now consider TypeScript experience a plus when hiring React Native developers .
Q: Where do I put platform-specific code?
A: React Native has built-in solutions:
Use
Platform.OSchecks:Platform.OS === 'ios' ? styleA : styleBPlatform-specific files:
Button.ios.jsandButton.android.jsPlatform-specific folders:
/components/ios/and/components/android/.
Q: How do I handle environment variables?
A: Use react-native-config for environment-specific variables. Never commit sensitive keys to your repository. Create .env.example with placeholder values and add .env to .gitignore.
Q: What about testing?
A: Place test files next to what they test (Component.js and Component.test.js in the same folder). Use Jest for unit tests and React Native Testing Library for component tests. For E2E testing, consider Detox or Maestro.
Q: How do I share code between React Native and web?
A: Consider a monorepo structure with shared packages. Extract business logic, utilities, and types into separate packages that both web and mobile can consume.


