React Native CLI: The Complete Guide for Professional Developers
Master React Native CLI from setup to deployment. Learn essential commands, project structure, CI/CD best practices, and see how top companies like Facebook use it. Start building powerful mobile apps today
Think React Native is just another JavaScript framework? Think again. The CLI unlocks a level of control that powers some of the world's most demanding mobile applications, from Facebook and Airbnb to Bloomberg and Walmart .
Imagine this: you write one piece of code and it runs on both iOS and Android, giving you near-native performance without the headache of maintaining two separate codebases. That’s the magic of React Native. But to truly harness that power—to go beyond simple demos and build production-ready, scalable applications—you need to master its foundational tool: the React Native Command Line Interface (CLI) .
For developers who want complete control over their mobile applications, React Native CLI is the gateway. While solutions like Expo offer fantastic starting points with less setup, the CLI provides the unadulterated power and flexibility that professional, complex apps often require. It’s the difference between a pre-assembled kit and a fully-equipped workshop where you control every tool .
This guide will cut through the noise. We’ll break down what the CLI actually is, why major companies bet on it, and give you a clear, actionable roadmap to use it effectively.
What Exactly is React Native CLI?
In the simplest terms, the React Native CLI (Command Line Interface) is your text-based control center for everything React Native. It's a set of commands you run in your terminal that handles the heavy lifting of creating, building, running, and managing your mobile app projects .
Think of it like the dashboard of a powerful car. You don't need to know how every single engine component works, but through the dashboard (the CLI), you can start the car (npx react-native run-android), check its status (npx react-native info), and perform essential maintenance (npx react-native upgrade) .
A Quick History Lesson: From "Fat" to "Lean"
Originally, the CLI was bundled directly into the core React Native library. However, in 2019, Facebook (now Meta) initiated a major re-architecture to address long-standing issues. They moved the CLI out into its own package under the @react-native-community/cli namespace. This created a "lean core" for React Native, making the framework more modular, efficient, and easier to maintain .
Key Takeaway: If you see old tutorials telling you to install react-native-cli globally, beware—that's the deprecated version. The current, official, and recommended CLI is @react-native-community/cli, and it’s automatically included as a dependency when you create a new project .
CLI vs. Expo: Choosing Your Path
Before diving into commands, it's crucial to understand the fork in the road. The React Native ecosystem offers two primary development paths, and your choice significantly impacts your workflow.
React Native CLI (The "Bare" Workflow): This gives you direct, unfiltered access to your native (
ios/andandroid/) project folders. You have maximum control and flexibility. You can link any native library, write custom native code (Java, Kotlin, Swift, Objective-C), and deeply customize your build process. The trade-off? More initial setup and responsibility for managing native dependencies .Expo (The "Managed" Workflow): Expo acts as a powerful framework and abstraction layer on top of React Native. It simplifies setup tremendously with tools like
npx create-expo-app, provides a rich suite of pre-built universal modules, and offers cloud build services. It's fantastic for prototyping, learning, and apps that don't require highly custom native functionality. When you need to "eject" to access native code, you transition to a bare workflow .
The React Native team itself recommends using a framework like Expo for new projects, as it lets you focus on writing your app rather than building your tooling . However, for learning the full stack or building apps with specific native requirements, starting with the CLI is invaluable.
Getting Started: Your First CLI Project
Ready to get your hands dirty? Let's build. First, ensure you have Node.js (version 16 or newer is a safe bet) and Watchman (on macOS) installed. You'll also need Android Studio for Android development and/or Xcode for iOS development .
Create Your Project: Open your terminal and run the following command. This uses the Community CLI to initialize a new project named "MyAwesomeApp".
bash
npx @react-native-community/cli@latest init MyAwesomeAppThis command creates the project folder, installs all necessary dependencies (React, React Native), and sets up the basic native project structures for iOS and Android .
Start the Metro Bundler: Metro is React Native's JavaScript bundler. In your project directory, run:
bash
npm start
# or
yarn start
Keep this terminal running. It's the development server that feeds your updated JavaScript code to the app .
Run Your App:
For Android: Open a new terminal (with Metro still running in the first one) and execute:
bash
npm run androidFor iOS: Navigate to the
ios/directory and runpod installfirst (if it's your first time), then in the project root:bash
npm run ios
If your emulator/simulator is set up correctly, you'll soon see your new app running !
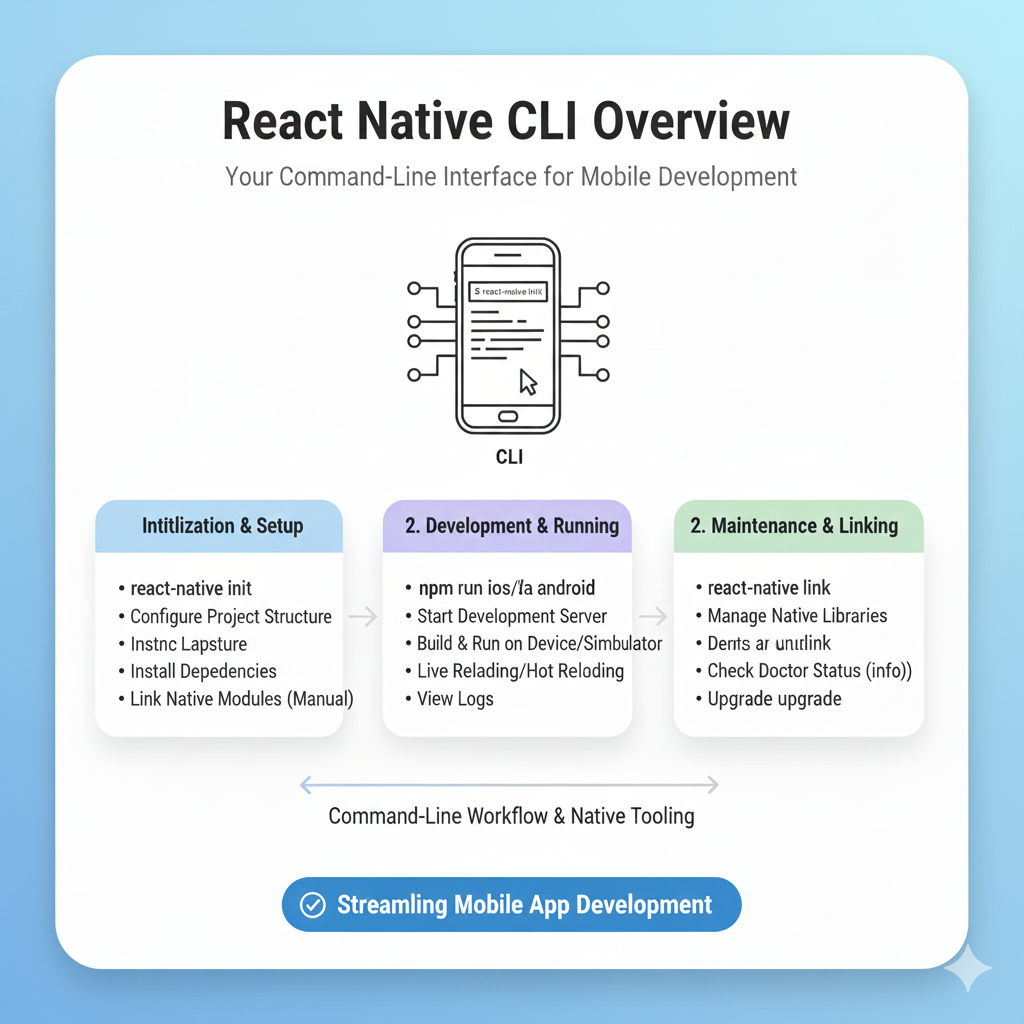
Essential Commands You'll Use Daily
Here’s a cheat sheet for the CLI commands that will become second nature :
Command | What It Does | Use Case |
|---|---|---|
| Starts the Metro bundler. | Beginning every development session. |
| Builds and installs the app on an Android device/emulator. | Testing on Android. |
| Builds and installs the app on an iOS simulator. | Testing on iOS. |
| Displays system, SDK, and toolchain versions. | Debugging environment issues. |
| (Legacy) Links native dependencies. | Note: Auto-linking is now standard; this is rarely needed. |
| Upgrades your project to a newer React Native version. | Keeping your project updated. |
| Streams device logs to your terminal. | Debugging runtime errors and logs. |
Building for Scale: Project Structure & Best Practices
A messy project is a painful project. As your app grows, a logical folder structure is non-negotiable for maintainability. Here’s a community-vetted structure that scales well :
text
MyAwesomeApp/
├── android/          # ⚠️ Native Android code. Don't touch unless you must!
├── ios/              # ⚠️ Native iOS code. Don't touch unless you must!
└── src/              # Your main JavaScript/TypeScript universe
    ├── assets/       # Images, fonts, videos
    ├── components/   # Reusable UI components (Buttons, Cards)
    ├── screens/      # Full-page components (HomeScreen, ProfileScreen)
    ├── navigation/   # All your routing and navigation logic
    ├── services/     # API calls, network layer
    ├── store/        # State management (Redux/Zustand slices)
    ├── utils/        # Helper functions (formatters, validators)
    ├── constants/    # App-wide colors, strings, configs
    └── hooks/        # Custom React hooks
Pro Tip: Set up absolute imports in your jsconfig.json or tsconfig.json file. This lets you import with @components/Button instead of a confusing chain of ../../../components/Button, making your code much cleaner .
Real-World Power: Who Uses React Native CLI?
This isn't just academic. The flexibility of the bare workflow is why industry giants use React Native in their most critical apps:
Facebook & Meta: The Ads Manager app and parts of the main Facebook app itself pioneered React Native development .
Airbnb: Used React Native to unify their team and improve the performance of their cross-platform mobile experience .
Bloomberg: Delivered a highly interactive, media-rich financial news app with a consistent experience across platforms .
Shopify & Wix: Both companies have bet their entire mobile suite on React Native, leveraging the CLI's power to build customizable, high-performance e-commerce tools .
Beyond Development: CI/CD and Automation
For professional teams, the journey doesn't end with writing code. Continuous Integration and Delivery (CI/CD) is what turns a codebase into a reliably shipped product. Automating your builds, tests, and deployments is crucial. Tools like GitHub Actions can run your Jest tests on every commit, while Fastlane can automate the tedious process of building release bundles and submitting them to the App Store and Google Play .
A solid CI/CD pipeline can reduce release cycles from days to hours and eliminate "it works on my machine" problems, ensuring every team member builds the app identically .
Level Up Your Skills
Understanding React Native CLI opens the door to professional mobile development. It’s a core skill for anyone serious about building robust, market-ready applications. To learn professional software development courses such as Python Programming, Full Stack Development, and MERN Stack, visit and enroll today at codercrafter.in. Building a strong foundation in these areas will perfectly complement your mobile development journey.
Frequently Asked Questions (FAQ)
Q: I'm coming from web development. Is the React Native CLI similar to Create React App (CRA)?
A: It's a similar concept—a command-line tool to scaffold and manage a project—but the output is fundamentally different. CRA creates a web project, while React Native CLI creates a mobile app project with native iOS and Android folders.
Q: Do I need to know Swift/Java to use React Native CLI?
A: For most apps, no. You can write 95-100% of your app in JavaScript/TypeScript. The CLI and the community's "auto-linking" handle most native integrations. You only dive into the native code for advanced, custom features.
Q: Can I switch from Expo to React Native CLI later?
A: Yes. Expo's "eject" (or "prebuild") process generates the ios/ and android/ directories, effectively giving you a bare project you can then manage with the CLI.
Q: What's the hardest part about using the CLI?
A: The initial environment setup, especially getting the Android SDK and Xcode properly configured, can be tricky. Additionally, managing native library compatibility can require more attention than in a managed workflow.
Conclusion: Embrace the Control
Starting your React Native journey with the CLI might feel like a steeper climb than using Expo, but the payoff is immense. You gain a deep, practical understanding of how mobile apps are built and packaged. You’re not abstracted away from the platform; you’re working with it. This knowledge makes you a more versatile, valuable, and powerful developer, capable of tackling the kind of complex app requirements that top companies demand.
So, fire up your terminal, run that init command, and start building. The world of truly native, cross-platform mobile development is waiting.


