Master React Native Styling: Complete Guide with Examples & Best Practices | CoderCrafter
Learn React Native styling like a pro! Our in-depth guide covers StyleSheet, flexbox, responsive design, theming, and real-world examples. Boost your mobile app development skills today.
Styling in React Native isn't about fighting with CSS—it's about mastering a system that lets you build beautiful, consistent mobile apps with JavaScript you already know.
Styling React Native apps can feel like a whole new world if you're coming from web development. You might be thinking, "Wait, where are my CSS classes? What happened to .container and #header?"
Here's the thing—React Native styling is actually more intuitive once you understand the system. Instead of juggling separate CSS files, you're writing styles directly in JavaScript, which means you can use all the programming logic you already know to create dynamic, responsive designs.
What Makes React Native Styling Different?
First, let's clear up some fundamental differences between web CSS and React Native styling:
It's all JavaScript objects: Every React Native component accepts a style prop, and you pass it a JavaScript object with your styles. Instead of background-color, you write backgroundColor—camel case instead of hyphens.
No CSS cascade: Styles don't automatically cascade to child elements. If you want a child to inherit styles, you need to explicitly pass them down.
Flexbox by default: While the web defaults to flex-direction: row, React Native uses flex-direction: column as its default. This makes sense for mobile screens that are typically taller than they are wide.
Unitless numbers: Instead of 10px or 2rem, you just write 10 or 2. React Native handles the conversion to device-appropriate pixels.
Platform-aware: The same code handles both iOS and Android, though you can customize per platform when needed.
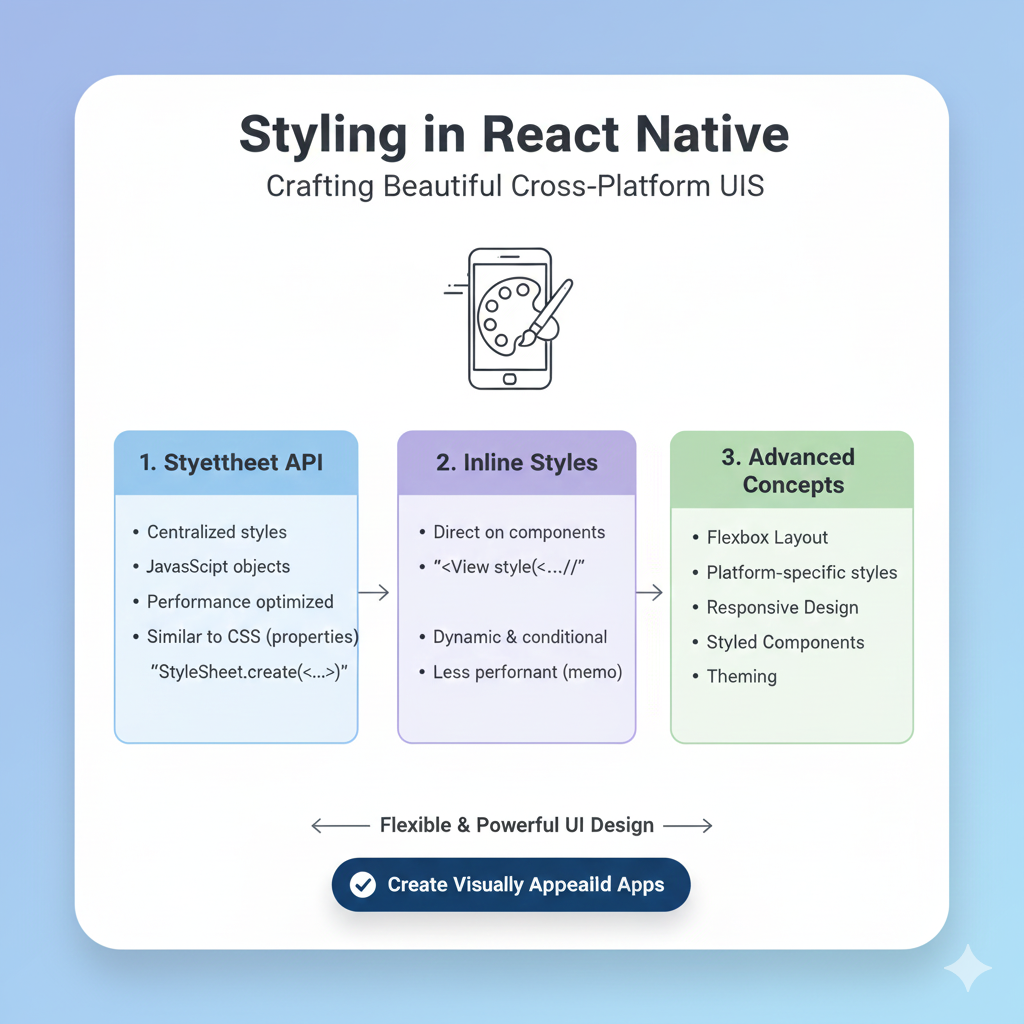
Your Styling Toolkit: From Simple to Sophisticated
1. Inline Styles: Quick and Dirty (Literally)
javascript
<View style={{ backgroundColor: 'red', padding: 10 }}>
  <Text>Hello world</Text>
</View>
This is perfect for one-off tweaks or prototypes, but for anything serious, you'll want something more maintainable.
2. StyleSheet.create(): The Gold Standard
This is React Native's built-in solution and what you'll use most often:
javascript
const styles = StyleSheet.create({
  container: {
    flex: 1,
    backgroundColor: 'white',
    padding: 16,
  },
  title: {
    fontSize: 24,
    fontWeight: 'bold',
    color: '#333',
  }
});

// In your component
<View style={styles.container}>
  <Text style={styles.title}>My Awesome App</Text>
</View>
Why StyleSheet? It's not just organization—React Native optimizes these styles by assigning unique IDs and sending them to the native side just once, making your app more performant. Plus, most IDEs give you autocomplete and type checking when you use StyleSheet.create().
3. External Libraries: When You Need More Power
Styled-components brings CSS-in-JS to React Native:
javascript
const StyledView = styled.View`
  background-color: ${props => props.primary ? 'blue' : 'white'};
  padding: 10px;
  border-radius: 5px;
`;
NativeWind lets you use Tailwind CSS classes:
javascript
<View className="flex-1 items-center justify-center bg-gray-200">
  <Text className="text-xl font-semibold text-blue-600">Hello world!</Text>
</View>
Both are excellent choices for larger projects where you need advanced theming or prefer utility-first styling.
Pro Tips I Wish I Knew Sooner
1. Build a Design System Early
The biggest mistake I see developers make is hardcoding values everywhere. When your designer says, "Let's change all our blues to teal," you don't want to be searching through 50 files. Create a theme file:
javascript
// theme.js
export const COLORS = {
  primary: '#3498db',
  background: '#f9f9f9',
  text: '#333333',
};

export const SPACING = {
  xs: 4,
  sm: 8,
  md: 16,
  lg: 24,
};

export const FONT_SIZES = {
  small: 14,
  medium: 16,
  large: 20,
};
Then use it everywhere:
javascript
import { COLORS, SPACING } from './theme';

const styles = StyleSheet.create({
  container: {
    backgroundColor: COLORS.background,
    padding: SPACING.md,
  }
});
This simple practice will save you countless hours.
2. Master Flexbox Layouts
Flexbox is React Native's layout engine, and understanding it is non-negotiable. Create common flex patterns you can reuse:
javascript
// commonStyles.js
export const commonStyles = StyleSheet.create({
  row: { flexDirection: 'row' },
  centered: { justifyContent: 'center', alignItems: 'center' },
  spaceBetween: { justifyContent: 'space-between' },
  grow: { flex: 1 },
});
Then compose them:
javascript
<View style={[commonStyles.row, commonStyles.spaceBetween]}>
  <Text>Item 1</Text>
  <Text>Item 2</Text>
</View>
3. Handle Platform Differences Gracefully
iOS and Android have different design conventions. Use Platform.select to handle these gracefully:
javascript
const styles = StyleSheet.create({
  header: {
    ...Platform.select({
      ios: {
        shadowColor: '#000',
        shadowOffset: { width: 0, height: 2 },
        shadowOpacity: 0.2,
        shadowRadius: 4,
      },
      android: {
        elevation: 4,
      },
    }),
  },
});
4. Make Your App Responsive
Mobile screens come in all sizes. Use the Dimensions API or useWindowDimensions hook to adapt your layout:
javascript
import { useWindowDimensions } from 'react-native';

function ResponsiveComponent() {
  const { width } = useWindowDimensions();
  const isTablet = width > 768;

  return (
    <View style={{ flexDirection: isTablet ? 'row' : 'column' }}>
      {/* Your content */}
    </View>
  );
}
Real-World Example: Building a Product Card
Let's bring it all together with a practical example:
javascript
import React from 'react';
import { View, Text, Image, StyleSheet } from 'react-native';
import { COLORS, SPACING } from '../theme';

const ProductCard = ({ product }) => {
  return (
    <View style={styles.card}>
      <Image source={{ uri: product.image }} style={styles.image} />
      <View style={styles.content}>
        <Text style={styles.title}>{product.name}</Text>
        <Text style={styles.price}>${product.price.toFixed(2)}</Text>
        <View style={styles.badge}>
          <Text style={styles.badgeText}>{product.category}</Text>
        </View>
      </View>
    </View>
  );
};

const styles = StyleSheet.create({
  card: {
    backgroundColor: COLORS.background,
    borderRadius: 8,
    padding: SPACING.md,
    marginBottom: SPACING.sm,
    // Cross-platform shadow
    ...Platform.select({
      ios: {
        shadowColor: '#000',
        shadowOffset: { width: 0, height: 2 },
        shadowOpacity: 0.1,
        shadowRadius: 4,
      },
      android: {
        elevation: 2,
      },
    }),
  },
  image: {
    width: '100%',
    height: 150,
    borderRadius: 4,
    marginBottom: SPACING.sm,
  },
  content: {
    flexDirection: 'row',
    justifyContent: 'space-between',
    alignItems: 'center',
  },
  title: {
    fontSize: 16,
    fontWeight: '600',
    color: COLORS.text,
    flex: 1,
    marginRight: SPACING.sm,
  },
  price: {
    fontSize: 18,
    fontWeight: 'bold',
    color: COLORS.primary,
  },
  badge: {
    backgroundColor: COLORS.primary + '20', // Add transparency
    paddingHorizontal: SPACING.xs,
    paddingVertical: 2,
    borderRadius: 4,
    position: 'absolute',
    top: SPACING.md,
    right: SPACING.md,
  },
  badgeText: {
    fontSize: 12,
    color: COLORS.primary,
    fontWeight: '500',
  },
});

export default ProductCard;
Common Pitfalls and How to Avoid Them
Overriding styles accidentally: When you pass an array of styles like style={[styles.base, styles.override]}, the last one wins. This is powerful but can cause confusion if you're not careful.
Not removing experimental styles: When trying different style properties, it's easy to leave unused ones in your code. This creates confusion for others (or future you). Always clean up.
Forgetting about inheritance: Text styles can inherit from parent Text components, but View styles don't. Plan your component structure accordingly.
Ignoring performance: For long lists, avoid inline styles and complex conditional style logic inside render functions. Use StyleSheet.create and memoize expensive style calculations.
Level Up Your Skills
Want to dive deeper into professional development practices? At codercrafter.in, we offer comprehensive courses that take you from beginner to job-ready developer. Our MERN Stack and Full Stack Development programs cover everything from React Native styling to backend integration and deployment. Whether you're building your first app or optimizing an enterprise application, our project-based curriculum gives you real-world experience.
FAQs
Q: Should I use inline styles or StyleSheet?
A: For production apps, almost always use StyleSheet.create(). It's optimized for performance and maintainability.
Q: Can I use CSS media queries in React Native?
A: Not directly. Instead, use the Dimensions API or useWindowDimensions hook to create responsive layouts.
Q: How do I handle dark mode?
A: Create theme objects for light and dark modes, then use React Context to provide the current theme throughout your app.
Q: What about animations?
A: React Native has its own animation API. For complex animations, check out libraries like React Native Reanimated.
Q: Are there any gotchas with specific style properties?
A: A few! flexDirection defaults to column (not row), negative margins aren't supported on Android, and touch areas don't extend beyond parent bounds.
Wrapping Up
Styling in React Native is a skill that grows with practice. Start with StyleSheet.create(), establish a design system early, and don't be afraid to leverage great libraries when your project needs them. Remember that consistency is key—pick an approach and stick with it throughout your project.
The beauty of React Native styling is that it leverages JavaScript's full power. You can create functions that return styles, use conditions to apply different styles, and build up complex interfaces from simple, reusable style objects.
What's your favorite React Native styling tip or trick? Share it in the comments below—I'm always looking to learn from the community!


